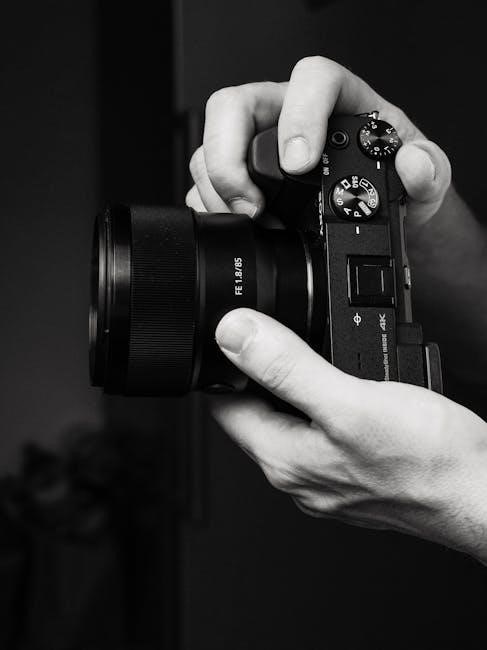
Mastering manual camera settings transforms your photography, enabling creative control and precision. A cheat sheet simplifies learning, offering quick reference guides for aperture, shutter speed, and ISO to improve your skills effortlessly.
What is a Manual Camera Settings Cheat Sheet?
A manual camera settings cheat sheet is a handy guide designed to simplify the process of understanding and using manual mode on your camera. It provides a quick reference for mastering aperture, shutter speed, and ISO, helping photographers make informed decisions. Often available as a downloadable PDF, these cheat sheets include charts, tables, and tips to help you grasp the exposure triangle and other essential settings. They are perfect for beginners and professionals alike, offering a portable and easy-to-use tool to enhance your photography skills and ensure optimal results in any shooting situation.
Why Use a Manual Camera Settings Cheat Sheet?
A manual camera settings cheat sheet is an invaluable tool for photographers seeking creative control and efficiency. It simplifies the learning process by providing quick references for aperture, shutter speed, and ISO, ideal for various scenarios like portraits or landscapes. The cheat sheet saves time during shoots by offering go-to settings, allowing focus on composition and lighting. It visualizes the exposure triangle, helping balance aperture, shutter speed, and ISO for optimal results. Additionally, it aids in maintaining consistent styles across photos and serves as a troubleshooting guide for common issues like underexposure. Its portability and structured format make it a great learning and teaching aid, ensuring you capture moments effectively without missing shots.
Benefits of Mastering Manual Mode
Mastering manual mode unlocks creative freedom, allowing photographers to achieve precise control over their shots. It ensures consistency in style and quality, even in challenging lighting conditions. By understanding aperture, shutter speed, and ISO, photographers can capture images that reflect their vision. Manual mode also enhances efficiency, as it reduces reliance on auto-settings and post-editing. It fosters a deeper connection with the craft, improving overall photography skills. Whether for professional or personal use, mastering manual mode elevates artistry, enabling photographers to produce stunning, high-quality images with confidence and precision;
The Exposure Triangle
The exposure triangle combines aperture, shutter speed, and ISO to control light and create balanced images. Each element works together to achieve optimal exposure and desired effects.
Understanding Aperture
Aperture is a fundamental element of the exposure triangle, controlling the amount of light entering the lens. Measured in f-stops (e.g., f/2.8 or f/16), it determines depth of field. A lower f-stop value means a larger aperture, creating a shallower focus, while a higher value results in a smaller aperture and greater depth of field. This setting is crucial for achieving desired effects in portraits, landscapes, and macro photography. Balancing aperture with shutter speed and ISO ensures properly exposed images. A manual camera settings cheat sheet simplifies understanding aperture values for various scenarios, helping photographers make informed decisions efficiently.
Understanding Shutter Speed
Shutter speed, measured in seconds or fractions of a second, controls how long the camera’s shutter remains open. It directly impacts the capture of motion and blur in images. Faster shutter speeds (1/1000th of a second or higher) freeze action, while slower speeds (1 second or lower) create artistic blur. This setting is vital for capturing dynamic effects, such as waterfalls or moving subjects. A manual camera settings cheat sheet provides guidance on selecting appropriate shutter speeds for various scenarios, helping photographers achieve their desired visual outcomes with precision and confidence.
Understanding ISO
ISO (International Organization for Standardization) refers to the camera’s sensitivity to light. Lower ISO values (e.g., ISO 100) are best for bright lighting conditions, while higher values (e.g., ISO 6400) are used in low light. However, high ISO settings can introduce noise or grain, affecting image quality. A manual camera settings cheat sheet helps photographers understand how to balance ISO with aperture and shutter speed for optimal results. It guides when to increase ISO without compromising image clarity, ensuring crisp and professional-looking photos in various lighting environments.
Aperture Settings
Aperture regulates light entry and depth of field. Lower f-stops (e.g., f/1.8) mean larger openings, more light, and shallower focus. Higher f-stops (e.g., f/16) reduce light and sharpen more of the image, ideal for landscapes. A manual camera settings cheat sheet simplifies choosing the right aperture for desired effects, ensuring balance in exposure and composition while enhancing creativity in various photography scenarios.
How Aperture Affects Depth of Field
Aperture directly influences depth of field, the zone in focus within an image. A larger aperture (lower f-stop, e.g;, f/2.8) creates a shallow depth of field, blurring backgrounds and emphasizing subjects, ideal for portraits. A smaller aperture (higher f-stop, e.g., f/11) results in a deeper depth of field, keeping more of the image sharp, perfect for landscapes or group photos. Understanding this relationship is key to controlling focus and composition. A manual camera settings cheat sheet provides quick guidance on selecting the right aperture for desired depth of field, enhancing creative control and precision in photography.
Common Aperture Values for Different Scenes
For portraits, apertures like f/1.8 to f/2.8 are ideal for a shallow depth of field, isolating subjects from backgrounds. In landscapes, use f/8 to f/11 to ensure sharpness across the frame. Street photography often benefits from f/4 to f/5.6, balancing subject isolation and context. For group photos, f/5.6 to f/8 keeps everyone in focus. A manual camera settings cheat sheet simplifies these choices, offering quick reference for aperture selection based on the scene, helping photographers achieve desired effects effortlessly. This guide ensures consistency and improves photo quality in various lighting conditions.
Practical Tips for Choosing the Right Aperture
When selecting aperture, consider the scene and desired depth of field. For portraits, prioritize a wide aperture (low f-stop) to isolate subjects. In landscapes, use a narrow aperture (high f-stop) for sharpness across the frame. Always balance aperture with shutter speed and ISO to maintain proper exposure. A manual camera settings cheat sheet can help you quickly identify ideal f-stops for various scenarios. Experiment with different apertures to understand their effects. Use the depth of field preview button to visualize results before shooting. By mastering aperture selection, you can achieve consistent, high-quality images tailored to your creative vision.
Shutter Speed Settings
Shutter speed controls motion and exposure. Fast speeds freeze action, slow speeds create blur. Adjust to balance creative effects and lighting conditions effectively always.
How Shutter Speed Affects Motion and Blur
Shutter speed determines how motion is captured in an image. Faster speeds freeze action, creating sharp images of moving subjects. Slower speeds introduce blur, conveying motion and artistic effects. A faster shutter speed is ideal for sports or wildlife photography, while slower speeds are great for capturing creative blur in waterfalls or car lights. Understanding this balance allows photographers to control how motion is represented. Experimenting with different speeds helps achieve desired effects, whether sharpness or artistic blur, enhancing the visual storytelling of a scene. This control is essential for mastering manual mode photography effectively.
Common Shutter Speed Values for Different Effects
Shutter speeds vary to achieve specific effects. For freezing fast action, use speeds like 1/500th of a second or faster. For sharp images with minimal blur, 1/125 to 1/250 is ideal. To create motion blur, try 1/30 to 1/60. Slower speeds (1-30 seconds) are great for artistic effects like light trails or silky water. Experimenting with these ranges helps photographers capture the desired mood and motion in their shots, making it easier to achieve professional-looking results in various lighting and action scenarios.
Practical Tips for Choosing the Right Shutter Speed
When selecting shutter speed, match it to your scene and creative goals. For sharp, freeze-framed images, choose speeds of 1/500 or faster. For motion blur, slow it down to 1/30 or below. Experiment with speeds to see how they affect your shot. Use a tripod for speeds below 1/60 to avoid camera shake. Pay attention to lighting conditions and adjust ISO or aperture if needed. Practice with different speeds to understand their impact and refine your technique for consistent results in various photography scenarios.
ISO Settings
ISO settings control light sensitivity, with lower values (ISO 100-400) ideal for bright conditions to minimize noise, while higher values (ISO 1600+) capture images in low light but may introduce grain, balancing quality and visibility.
How ISO Affects Image Quality
ISO regulates the camera’s light sensitivity, impacting image quality. Lower ISOs (100-400) capture sharp, noise-free photos in bright light, while higher ISOs (6400+) introduce grain in low-light conditions. Balancing ISO is crucial for clarity.
Common ISO Values for Different Lighting Conditions
ISO values are adjusted based on lighting to achieve optimal results. In bright sunlight, ISO 100-200 is ideal for sharp, detailed images. Indoors with artificial light, ISO 400-800 is commonly used to balance illumination. Low-light conditions, such as evening or dusk, often require ISO 1600-6400 to capture sufficient detail. Extremely dark environments may necessitate ISO 12800 or higher, though this increases noise. Adjusting ISO according to lighting ensures properly exposed photos while minimizing grain.
Practical Tips for Choosing the Right ISO
When selecting ISO, start with the lowest possible value (ISO 100-200) for bright lighting to minimize noise. In low-light conditions, gradually increase ISO while monitoring your camera’s noise performance. Use Auto ISO with a maximum limit to avoid excessive grain. Consider the scene’s motion—higher ISOs can help freeze action in dim light. Always review your images to ensure ISO-related noise isn’t distracting. Balancing ISO with aperture and shutter speed is key for optimal results in any lighting scenario.

Using the Cheat Sheet in Different Photography Scenarios
The manual camera settings cheat sheet is a quick reference guide for optimizing your shots in various photography scenarios, from portraits to landscapes and dynamic events.
Portrait Photography Settings
For portrait photography, use a wide aperture like f/1.8 to f/2.8 to create a shallow depth of field, blurring the background and emphasizing your subject. A fast shutter speed (1/125s to 1/250s) ensures sharp images, while a low ISO (100-400) minimizes noise. Position your subject near natural light for soft, flattering results. Experiment with off-center composition and a clean background to enhance focus on your subject. Refer to the cheat sheet for aperture, shutter, and ISO combinations tailored to capture stunning portraits in various lighting conditions, ensuring professional-grade results every time.
Landscape Photography Settings
For landscape photography, use a narrow aperture (f/8 to f/11) to ensure a large depth of field, keeping the entire scene sharp. A tripod is essential for stability, allowing slower shutter speeds (1/30s to 30s) to capture motion in water or clouds. Start with a low ISO (100-400) to minimize noise. Use neutral density filters for extreme lighting conditions or to blur water. Shoot during the golden hour for vibrant colors. Refer to the cheat sheet for optimal aperture, shutter, and ISO combinations to balance detail and lighting, ensuring crisp, professional-grade landscape images in any setting.
Street Photography Settings
For street photography, prioritize a wide aperture (f/2.8 to f/5.6) to isolate subjects and blur busy backgrounds. Use a fast shutter speed (1/500s to 1/2000s) to freeze dynamic moments and avoid motion blur. Keep ISO moderate (400-1600) to handle varying urban lighting without excessive noise. Shoot handheld for agility, enabling quick adjustments; Use burst mode to capture decisive moments and experiment with different angles. Refer to the cheat sheet for ideal aperture-shutter-ISO combinations, ensuring sharp, engaging street shots that tell compelling stories in any urban environment.

Additional Tips for Effective Manual Mode Photography
Master manual mode by using exposure compensation, Bracketing, and adjusting white balance to enhance colors. Regularly check lighting changes and use the cheat sheet for quick reference.
How to Balance the Exposure Triangle
Balancing the exposure triangle involves harmonizing aperture, shutter speed, and ISO. Start with one setting, like aperture for depth of field, then adjust shutter speed and ISO accordingly. For portraits, use a low f-stop and faster shutter speed. In low light, increase ISO cautiously to avoid noise. Use a cheat sheet to guide adjustments in different lighting. For motion blur, slow shutter speed may require smaller aperture or lower ISO. Experiment with middle aperture values like f/5.6 and adjust. Utilize the sunny 16 rule or camera meter for reference, and consider bracketing shots for optimal exposure.
Using White Balance Effectively
White balance ensures accurate color representation in your photos. It adjusts the color temperature to match lighting conditions, preventing unwanted color casts. Use presets like Daylight, Tungsten, or Fluorescent for common scenarios. For precision, set custom white balance using a gray card or neutral object. This enhances color accuracy and realism. Experiment with creative white balance for artistic effects. Refer to your cheat sheet for guidance on matching settings to lighting conditions. Proper white balance elevates image quality and professionalism, making it a crucial skill for manual mode photography.
Practical Tips for Avoiding Common Mistakes
To avoid common mistakes in manual mode, start with simple compositions and gradually experiment. Always double-check the exposure triangle balance before shooting. Use your cheat sheet as a quick reference for aperture, shutter speed, and ISO settings. Avoid overcomplicating shots—focus on one element at a time. Ensure proper focus by using manual focus or AF with careful subject tracking. Review your images on the camera’s LCD to catch errors early. Practice regularly to build muscle memory and confidence. By following these tips, you’ll minimize errors and improve your photography skills effectively.
Downloading and Using the Manual Camera Settings Cheat Sheet PDF
Access the manual camera settings cheat sheet PDF through reputable photography websites or forums. Download the free resource for quick reference. Print and laminate it for durability. Carry it in your camera bag or store it digitally on your device. Refer to it during shoots to ensure optimal aperture, shutter speed, and ISO settings. Use it to enhance your understanding and application of manual mode photography, helping you capture stunning images with ease and confidence.
How to Access the Free PDF Download
Visit the website offering the manual camera settings cheat sheet PDF. Locate the download link, usually found in a prominent section like “Resources” or “Downloads.” Click on the link to initiate the download. Some sites may require you to sign up with an email address to access the PDF. Once downloaded, save it to a dedicated folder for easy access. For offline use, print the cheat sheet and laminate it for durability. This guide ensures you always have a quick reference for mastering manual camera settings, whether you’re at home or on location.
Printing and Laminating the Cheat Sheet
Print the manual camera settings cheat sheet PDF on high-quality paper for clarity. Use a standard paper size, such as A4 or letter, to ensure readability. For durability, laminate the printed sheet using a thermal laminator or clear plastic sleeves. This protects it from moisture and wear. Once laminated, trim the edges neatly for a professional finish. Store it in a convenient location, such as near your camera bag or on a clipboard, to reference during photo shoots. Laminating ensures your cheat sheet remains a reliable, long-lasting tool for mastering manual camera settings in any environment.
Referencing the Cheat Sheet During Photo Shoots
Keep the cheat sheet easily accessible during photo shoots for quick reference. Place it in a visible spot, such as on a clipboard or attached to your camera bag, to minimize distractions. Use it to adjust aperture, shutter speed, and ISO settings swiftly, ensuring you capture the desired effect. The cheat sheet helps you make informed decisions without trial and error, saving time and improving your workflow. Whether you’re shooting portraits, landscapes, or street photography, it serves as a reliable guide to achieve optimal results in various lighting conditions and scenarios.
Mastering manual camera settings enhances your photography skills, allowing creative control and professional results. The cheat sheet is a valuable resource to guide you effectively.
Final Thoughts on Mastering Manual Camera Settings
Mastery of manual camera settings is a transformative skill, empowering photographers to unlock creative potential. The cheat sheet serves as an invaluable guide, simplifying complex adjustments. By practicing and experimenting, photographers can confidently balance aperture, shutter speed, and ISO. This knowledge fosters artistic expression and precision in every shot. Remember, manual mode is a tool, not a constraint. Use the cheat sheet as a quick reference to refine your technique and explore new possibilities. With dedication, you’ll capture stunning images that reflect your unique vision and skill.
Encouragement to Practice and Experiment
Consistent practice and experimentation are key to mastering manual camera settings. Start by experimenting with different aperture, shutter speed, and ISO combinations to see how they affect your images. Use the cheat sheet as a guide, but don’t hesitate to step out of your comfort zone. Shoot familiar subjects first, then explore new scenes. Review your photos regularly to identify areas for improvement. Remember, creativity thrives when you push boundaries. Keep experimenting, and over time, manual mode will become second nature, allowing you to capture moments with precision and artistry.